-
Sous Vide Prime Rib
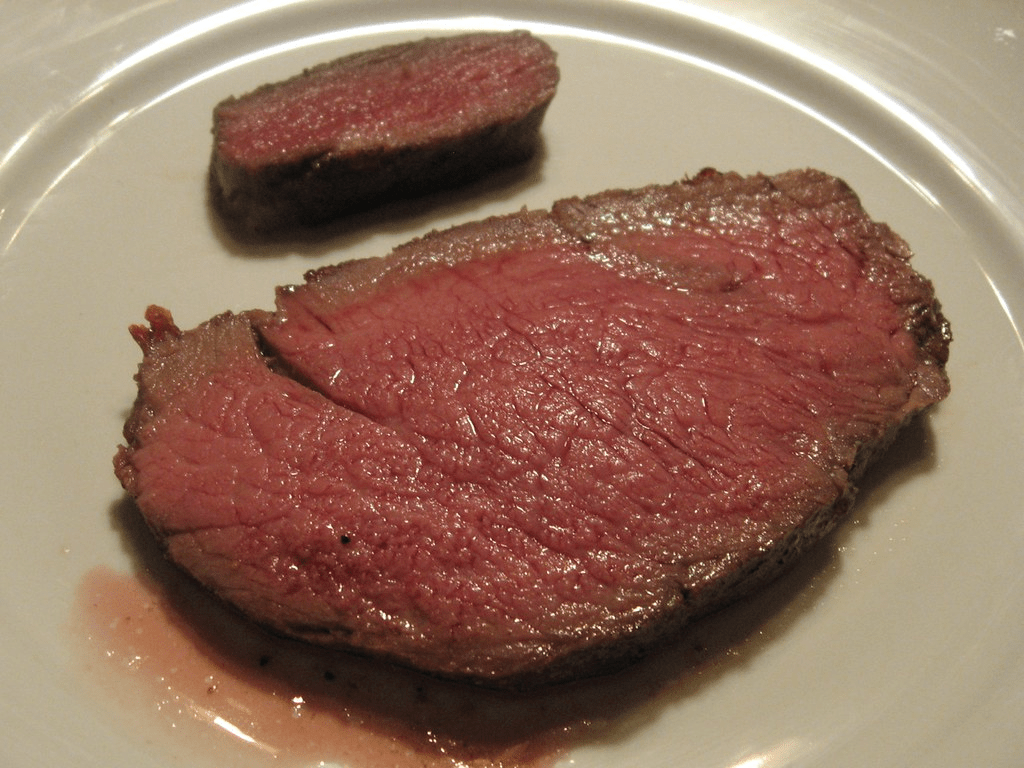
If you want to wow a crowd (or just yourself), look no further than prime rib. Big, juicy, tender, and downright indulgent—it’s the kind of roast that steals the show. The only problem? Cooking it evenly without stressing over the oven. That’s where sous vide saves the day. With this method, you get perfectly cooked prime rib from edge to edge, every single time. Add in some garlic, herbs, butter, and a hot skillet finish, and you’ve got yourself the kind of meal people will talk about long after the last bite.
Ingredients for Sous Vide Prime Rib
1 bone-in prime rib roast (about 4-6 pounds)
Salt and freshly ground black pepper
4-6 garlic cloves, minced
A few sprigs of fresh rosemary and thyme
2-3 tablespoons olive oil
2-3 tablespoons unsalted butter
Optional: 1-2 teaspoons of your favorite steak seasoning or rubSous Vide Equipment
Sous vide immersion circulator
Large vacuum-sealable bag or heavy-duty resealable bag
Food-safe container or large stockpot
Digital kitchen thermometer
Cast iron skillet or heavy-duty pan
TongsHow to Cook Your Sous Vide Prime Rib
Preheat your sous vide bath: Fill a large container or stockpot with water and attach your sous vide immersion circulator. Set the water temperature to your desired final steak temperature (typically 130°F/54°C for medium-rare or 135°F/57°C for medium) and allow the water to come to temperature.
Prepare the prime rib: If the prime rib roast has a thick layer of fat, you can trim it to your preference, but it’s often better to leave some for flavor. Season the roast generously with salt, pepper, and your preferred steak seasoning or rub, if desired. Rub minced garlic onto the meat, and place a few sprigs of fresh rosemary and thyme on top. Drizzle the roast with olive oil.
Vacuum-seal the roast: Place the seasoned prime rib into a vacuum-sealable bag or heavy-duty resealable bag. If using a resealable bag, use the water displacement method to remove air from the bag: partially seal the bag and immerse it in the water bath, allowing the water to push the air out before sealing it completely.
Sous vide cooking: Carefully place the bag with the prime rib into the preheated water bath, ensuring the meat is fully submerged. Clip the bag to the side of the container to prevent it from floating. Cook the prime rib for 4 to 6 hours for a roast of this size. This long cooking time allows for a perfect even temperature throughout the meat.
Finishing on the stovetop: When the sous vide cooking time is almost complete, preheat a cast iron skillet or heavy-duty pan over high heat. Add the butter and allow it to melt.
Searing the prime rib: Carefully remove the prime rib from the bag and pat it dry with paper towels. Heat the skillet until it’s smoking hot. Sear the prime rib on all sides, including the fatty side, for about 1-2 minutes per side, until it develops a beautiful, golden-brown crust.
Rest and carve: Remove the prime rib from the skillet and allow it to rest for 10-15 minutes to redistribute the juices. Carve the prime rib into thick slices, following the bone if it’s bone-in, and serve immediately.
Optional au jus: You can make a simple au jus sauce by deglazing the skillet with a bit of red wine or beef broth. Reduce it, season with salt and pepper, and serve alongside the prime rib.
Frequently Asked Questions
How long should I sous vide a prime rib roast?
For a 4–6 pound roast, 4 to 6 hours in the water bath is ideal. The longer cook time helps the meat stay tender and evenly cooked without overdoing it.
What temperature should I use for sous vide prime rib?It depends on how you like it: 130°F (54°C) for medium-rare, 135°F (57°C) for medium. Because sous vide is precise, you’ll get that doneness all the way through the roast.
Do I really need to sear it afterward?
Yes! The sous vide takes care of perfect doneness, but the quick sear adds that golden-brown crust and rich flavor that makes prime rib irresistible.
Can I make this ahead of time?
Absolutely. You can cook the roast sous vide, chill it in the bag in an ice bath, and store it in the fridge for up to 2 days. When ready to serve, reheat it in the sous vide bath for an hour, then sear as usual.
-
Sous Vide Prime Rib
Prepare to embark on a culinary journey that redefines your perception of prime rib with our sous vide method. This extraordinary recipe promises to deliver a prime rib roast like no other – flawlessly cooked to your preferred level of doneness, incredibly juicy, and teeming with rich, savory flavors.
[wptb id=402]The secret?
Sous vide cooking paired with the art of precise searing in a cast iron skillet.
Whether you’re hosting a grand feast or simply craving a steakhouse-level dining experience at home, this recipe ensures that your prime rib emerges as the centerpiece of a memorable and mouthwatering occasion.
Why this recipe works
With the sous vide style of cooking, your prime rib will be cooked to your desired temperature throughout. This ensures that every bite is tender and perfectly cooked.
By sealing the prime rib in a vacuum-sealed bag during sous vide cooking, the meat retains its juices and flavors. Sealing your prime rib results in a remarkably juicy and flavorful roast. This allows further flavor enhancement by creating a delicious, uniform crust.
//z-na.amazon-adsystem.com/widgets/onejs?MarketPlace=US&adInstanceId=db2d8034-1d3a-4ce2-967c-0cdb28c42cd9Sous Vide Prime Rib Ingredients
1 bone-in prime rib roast (about 4-6 pounds)
Salt and freshly ground black pepper
4-6 garlic cloves, minced
A few sprigs of fresh rosemary and thyme
2-3 tablespoons olive oil
2-3 tablespoons unsalted butter
Optional: 1-2 teaspoons of your favorite steak seasoning or rubWhat Equipment Should I Use?
Sous vide cooker: A sous vide immersion circulator provides precise temperature control, ensuring that your prime rib is cooked to your exact desired doneness. It eliminates the guesswork associated with traditional cooking methods, where fluctuations in oven or grill temperatures can lead to uneven cooking.
Large vacuum-sealable bag and vacuum sealer: Vacuum-sealing removes most of the air from the bag. Air contains oxygen, which can promote oxidation and lead to changes in the taste, texture, and color of the food, particularly in longer sous vide cooks. By eliminating the air, you help preserve the quality of the food.
Sous Vide Container: A sous vide container is specifically designed to hold water at a consistent temperature. The container’s insulation helps maintain the desired cooking temperature with minimal heat loss, ensuring that your prime rib cooks evenly and precisely.
Disclaimer: These are paid for affiliate links. If you make a pruchase after clicking a link, we may make a small commission.
How to Cook Sous Vide Prime Rib
1) Preheat your sous vide bath: Fill a large container or stockpot with water and attach your sous vide immersion circulator. Set the water temperature to your desired final steak temperature (typically 130°F/54°C for medium-rare or 135°F/57°C for medium) and allow the water to come to temperature.
2) Prepare the prime rib: If the prime rib roast has a thick layer of fat, you can trim it to your preference, but it’s often better to leave some for flavor. Season the roast generously with salt, pepper, and your preferred steak seasoning or rub, if desired. Rub minced garlic onto the meat, and place a few sprigs of fresh rosemary and thyme on top. Drizzle the roast with olive oil.
3) Vacuum-seal the roast: Place the seasoned prime rib into a vacuum-sealable bag or heavy-duty resealable bag. If using a resealable bag, use the water displacement method to remove air from the bag: partially seal the bag and immerse it in the water bath, allowing the water to push the air out before sealing it completely.
4) Sous vide cooking: Carefully place the bag with the prime rib into the preheated water bath, ensuring the meat is fully submerged. Clip the bag to the side of the container to prevent it from floating. Cook the prime rib for 4 to 6 hours for a roast of this size. This long cooking time allows for a perfect even temperature throughout the meat.
5) Finishing on the stovetop: When the sous vide cooking time is almost complete, preheat a cast iron skillet or heavy-duty pan over high heat. Add the butter and allow it to melt.
6) Searing the prime rib: Carefully remove the prime rib from the bag and pat it dry with paper towels. Heat the skillet until it’s smoking hot. Sear the prime rib on all sides, including the fatty side, for about 1-2 minutes per side, until it develops a beautiful, golden-brown crust.
7) Rest and carve: Remove the prime rib from the skillet and allow it to rest for 10-15 minutes to redistribute the juices. Carve the prime rib into thick slices, following the bone if it’s bone-in, and serve immediately.
8) Optional au jus: You can make a simple au jus sauce by deglazing the skillet with a bit of red wine or beef broth. Reduce it, season with salt and pepper, and serve alongside the prime rib.
Frequently Asked Questions
What’s the advantage of cooking prime rib sous vide?
Sous vide cooking allows for precise temperature control, ensuring your prime rib is cooked to your desired doneness from edge to edge. It’s virtually impossible to overcook it, and the result is incredibly tender and juicy meat.
What temperature should I set the sous vide bath for prime rib?
For medium-rare prime rib, set the sous vide bath to 130°F (54°C). For medium, aim for 135°F (57°C). These temperatures ensure a perfect, evenly cooked roast.
How long do I sous vide prime rib?
The cooking time can vary based on the size of the roast. Typically, you’ll sous vide for 4-6 hours for a 4-6 pound prime rib. Longer cooking times can yield even more tenderness.
What should I serve with sous vide prime rib?
Classic accompaniments include mashed potatoes, roasted vegetables, a flavorful gravy or au jus, and a side of horseradish sauce for extra flavor.
Other Sous Vide Recipes
-
Sous Vide Sausage
Disclaimer: Some links on the site may take you to affiliate links where we earn a small percentage if you choose to purchase something. You are in no way obiligated to purchase something.
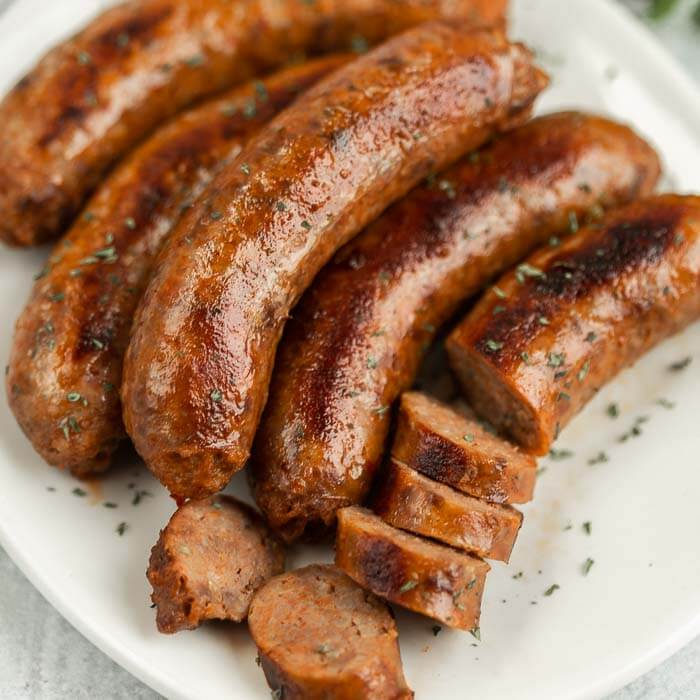
Indulge in the delectable world of Italian cuisine with our sous vide sausage recipe. Whether you prefer a mild or spicy kick, this method guarantees a perfect balance of tenderness and flavor in every bite. Sous vide cooking not only ensures that your sausages are cooked to absolute precision but also allows you to infuse them with seasonings, creating a delightful depth of taste.
The sausages are gently cooked in a sous vide water bath, which preserves their juices and delivers a melt-in-your-mouth texture. A flavorful combination of garlic, onion, and colorful bell peppers sautéed to perfection serves as the ideal complement to our Italian sausages.
This recipe is not only an homage to the bold flavors of Italy but also a testament to the ease and excellence of sous vide cooking. So, let’s embark on a culinary journey to create a memorable Italian-inspired meal that will leave your taste buds singing.
Read: Best Sous Vides Under $100
[wptb id=402]What is sous vide?
Sous vide cooking is a culinary technique that involves cooking food in a precisely controlled water bath at a consistent and specific temperature.
The term “sous vide” is French and translates to “under vacuum,” which refers to the practice of vacuum-sealing food in airtight bags before immersing it in the water bath.
Why this recipe works
Traditional cooking methods such as grilling or pan-frying can lead to moisture loss in sausages, resulting in dry and less flavorful meat. Sous vide, on the other hand, preserves the natural juices and flavors of the sausages, making them incredibly moist and succulent.
Seasoning the sausages before sealing them in the sous vide bags allows the flavors to infuse deeply into the meat during the cooking process. This means that every bite of the sausage is rich in taste, with the oregano, salt, and pepper enhancing the overall flavor profile.
The option to sear the sausages in a hot skillet or on a grill after sous vide cooking adds a delightful crispy exterior while keeping the interior tender. This step provides an additional layer of texture and flavor to the sausages.
What equipment to use
Sous Vide Machine: This device is essential for maintaining a precise water temperature during the sous vide cooking process. Ensure it’s capable of reaching and holding 140°F (60°C).
Sous Vide Containers: You’ll need a container to hold the water for the sous vide bath. Make sure it’s deep enough to fully immerse the sausages in the water.
Vacuum Sealer: To properly seal the sausages for sous vide cooking, you can use a vacuum sealer with appropriate bags.
Ingredients for Sous Vide Sausage
4 Italian sausages (mild or spicy, your choice)
2 tablespoons olive oil
2 cloves garlic, minced
1 small onion, finely chopped
1 red bell pepper, sliced
1 green bell pepper, sliced
1 teaspoon dried oregano
Salt and pepper to taste
Fresh basil or parsley for garnish (optional)How to Make the Sous Vide Sausage
1) Fill a large container or sous vide water bath with water and set the sous vide immersion circulator to 140°F (60°C).
2) Season the sausages with salt, pepper, and dried oregano. This will infuse the sausages with flavor during the sous vide cooking process.
3) Place each seasoned sausage into a separate vacuum-seal bag. You can also use a zip-top bag, removing as much air as possible by the water displacement method.
4) Submerge the sealed sausages into the preheated water bath, ensuring they are fully covered. Clip the bags to the side of the container to keep them from floating.
5) Cook the sausages for 1.5 to 4 hours. The longer the cook, the tenderer the sausages will be. For a traditional texture, 1.5 to 2 hours is sufficient. For extra tenderness, you can go up to 4 hours.
6) While the sausages are cooking sous vide, heat olive oil in a skillet over medium heat. Add minced garlic and chopped onion. Sauté until the onion becomes translucent.
7) Add the sliced red and green bell peppers to the skillet with the sautéed garlic and onion. Cook until the bell peppers are tender and slightly caramelized.
8) After the sous vide cook, remove the sausages from the bags. If you desire a crispy exterior, sear the sausages in a hot skillet or on a grill for a few minutes on each side until they develop a brown crust.
Frequently Asked Questions
What’s the recommended cooking time for the sous vide sausages?
The cooking time for sausages can vary depending on your desired texture. For traditional results, cook them sous vide for 1.5 to 2 hours. If you prefer extra tenderness, you can extend the cooking time to up to 4 hours.
Do I have to sear the sausages after sous vide cooking?
Searing the sausages after sous vide cooking is optional but recommended. It adds a delightful crispy exterior and enhances the overall flavor. If you choose not to sear, the sausages will still be tender and flavorful.
What temperature should the water bath be set to for sous vide cooking?
Set the sous vide water bath to 140°F (60°C) to achieve the recommended results for this recipe.
Can I use frozen sausages with this recipe?
While it’s best to use thawed sausages for precise cooking, you can still cook frozen sausages sous vide by extending the cooking time. Ensure that they are well-sealed in the bags to prevent water from entering.
More Sous Vide Recipes and Tips
-
Sous Vide Tri Tip Recipe
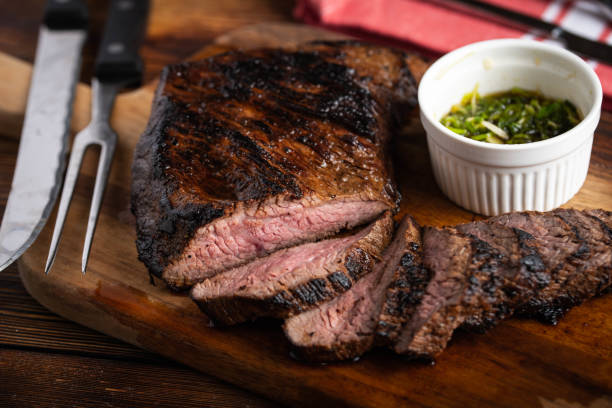
Among the many cuts of beef that benefit from sous vide, the tri-tip steak stands out as a prime candidate for sous vide preparation. This sous vide tri-tip recipe is your gateway to achieving steak nirvana in your own kitchen.
We’ll take you on a journey through the precise science of sous vide cooking, where the meat’s tenderness and juiciness are non-negotiable. This method allows you to maintain complete control over the final result, ensuring a perfectly cooked, medium-rare tri-tip steak every single time.
[wptb id=402]Why should you sous vide tri tip?
With how lean the tri tip is, the sous vide technique is perfect for allowing all the different flavors to seep in throughout the meat.
A sous vide trip tip is going to be extra tender because you will let the meat cook in the bath water for 6 – 10 hours.
Best Temperature for Tri Tip
For the most tender tri tip, the internal temperature should read somewhere between 130°–135°F. This will be the meat is at its juiciest.
But if you want a more exact temperature, opt for 130° F. This will give the trip tip its famed reddish color.
What equipment should I use?
Sous Vide machine – There are a great number of sous vide machines on the market. Check out our article on some of the best sous vide machines for beginners. These devices will certainly up your cooking repitoire.
Sous Vide container – A large container for sous vide is great, especially for sous viding large cuts of meat. You want to be able to ensure that the meat gets cooked thoroughly. If you do not have a large container, then it may take little extra time to get the perfect cook.
Vacuum sealer – If you are not having luck with the water displacement method for sealing your meat, opt for a vacuum sealer. There are a large range of options out there and you do not have to spend a ton to get a good vacuum sealer.
Disclaimer: If you make a purchase through one of our affiliate links, we may make a small portion of all orders.
Side Dishes
You can’t serve the tri tip empty handed. Here are some excellent side dishes that you can sous vide!
Sous Vide Tri Tip Ingredients
1 tri-tip steak (approximately 2-3 pounds)
2 tablespoons of olive oil
4 cloves of garlic, minced
1 tablespoon of fresh rosemary, chopped
1 tablespoon of fresh thyme, chopped
Salt and pepper, to taste
1-2 sprigs of rosemary and thyme for aromatics (optional)How to Make the Sous Vide Trip Tip
1. Set your sous vide machine to 132°F (55.6°C) for a perfect medium-rare finish. This temperature ensures a tender and juicy tri-tip.
2. In a small bowl, combine the olive oil, minced garlic, chopped rosemary, and thyme. Mix well. Season the tri-tip generously with salt and pepper.
3. Rub the herb and garlic mixture all over the tri-tip, making sure it’s evenly coated. You can also add a sprig or two of rosemary and thyme for extra flavor.
4. Place the seasoned tri-tip in a vacuum-seal bag or a large, high-quality zip-lock bag. If using a zip-lock bag, use the water displacement method to remove air and seal the bag tightly, ensuring no air is trapped inside.
Gently submerge the sealed tri-tip into the preheated sous vide bath.
5. Cook the tri-tip in the water bath for 6 to 10 hours. The longer you cook it, the more tender it will become. Cooking for 6 hours will give you a slightly firmer texture, while 10 hours will result in a melt-in-your-mouth tenderness.
6. When the sous vide cooking time is complete, carefully remove the tri-tip from the bag and pat it dry with paper towels. Let it rest for a few minutes. Heat a grill, cast-iron pan, or a heavy skillet to high heat. You can also use a torch for an even sear.
Sear the tri-tip on all sides for 1-2 minutes per side, or until you achieve a beautiful crust. The high heat will enhance the flavor and texture of the steak.
7. Let the seared tri-tip rest for about 5 minutes to allow the juices to redistribute.
Slice the tri-tip against the grain into thin, even slices for the most tender and flavorful results.
8. Serve your perfectly cooked and seared sous vide tri-tip immediately. It pairs wonderfully with a fresh green salad, roasted vegetables, or your favorite side dishes.
Frequently Asked Questions
How long does it take to sous vide tri tip?
It usually takes between 6 and 10 hours depending on how long tender you want the meat to be. However, we recommend sticking closer to that six hour range for the optimal juiceness.
Can I use a different cooking temperature for the tri-tip?
Yes, you can adjust the cooking temperature to your liking. A higher temperature will yield a more medium or medium-well result, while a lower temperature will be rarer. Just be sure to adjust the cooking time accordingly.
What’s the advantage of searing the tri-tip after sous vide cooking?
Searing the tri-tip after sous vide cooking creates a flavorful crust and enhances the appearance. It also helps to develop a richer, roasted flavor on the outside while preserving the tenderness inside.
How can I tell if the tri-tip is done cooking?
Since sous vide cooking is precise, your tri-tip will be perfectly cooked according to the set temperature and time. All that’s left is to sear it for a few minutes and serve. No need to worry about overcooking.
Do I need to rest the tri-tip after sous vide cooking?
It’s a good idea to rest the tri-tip for a few minutes after removing it from the sous vide bath. This allows the juices to redistribute, resulting in a juicier steak.
Other Sous Vide Recipes
{ “@context”: “https://schema.org/”, “@type”: “Recipe”, “name”: “Sous Vide Tri Tip”, “author”: { “@type”: “Person”, “name”: “Sous Vide for All” }, “image”: “https://sousvideforall.com/wp-content/uploads/2024/02/f7940-sous-vide-tri-tip.jpg”, “datePublished”: “2023-06-18”, “description”: “Delicious sous vide tri tip roast recipe with a flavorful sear.”, “prepTime”: “PT30M”, “cookTime”: “PT6H”, “recipeYield”: “4 servings”, “recipeIngredient”: [ “2 pound tri tip roast”, “Salt”, “Pepper”, “Rosemary sprigs”, “1 teaspoon of olive oil for searing in a cast iron after a sous vide” ], “recipeInstructions”: [ { “@type”: “HowToStep”, “text”: “Warm your sous vide bath to 132 F for a medium rare temperature.” }, { “@type”: “HowToStep”, “text”: “While the bath is warming up, season your tri tip with the above ingredients.” }, { “@type”: “HowToStep”, “text”: “Use a vacuum sealer to lock in the tri tip or get a large zip lock bag and use the water displacement method to lower the tri tip into the bath. Allow the tri tip to cook in the bath for anywhere between 6 and 10 hours depending on how you want the meat done.” }, { “@type”: “HowToStep”, “text”: “Sear the tri tip for just a few minutes once out of the sous vide bath.” }, { “@type”: “HowToStep”, “text”: “Slice the sous vide tri tip against the grain after the sear.” }, { “@type”: “HowToStep”, “text”: “Serve immediately with your choice of sides or salads!” } ], “recipeCategory”: “Main course”, “recipeCuisine”: “American” } -
Sous Vide Chicken Thighs
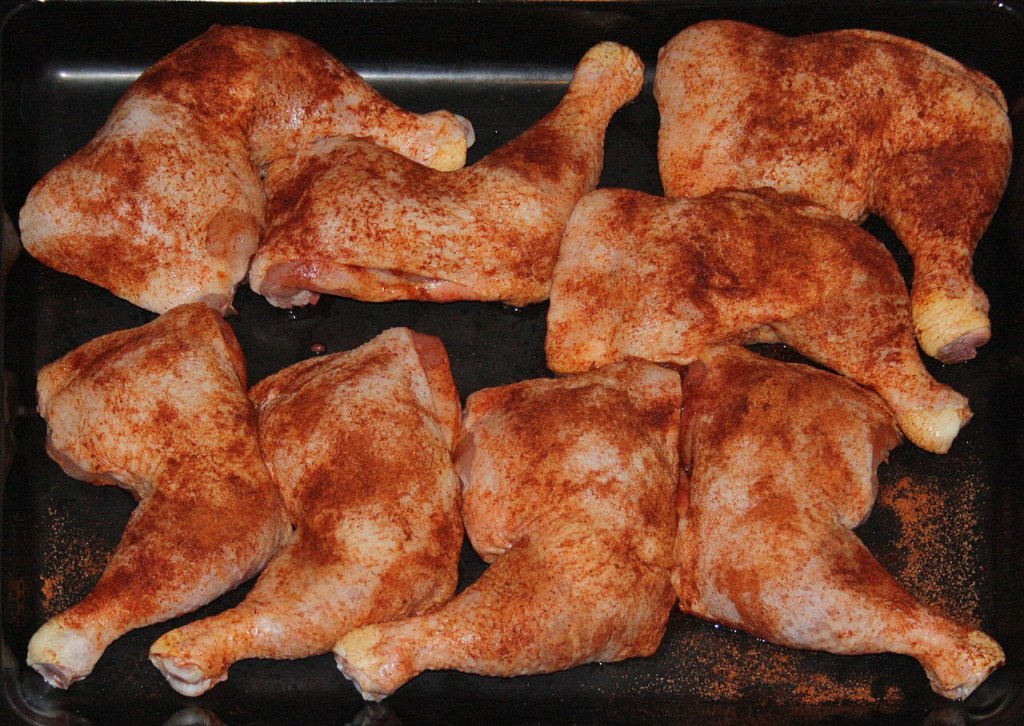
Sous vide cooking offers precision like no other, ensuring your chicken is cooked to perfection every single time. In this recipe, we tackle sous vide chicken thighs.
We start by gently cooking sous vide them at a precisely controlled temperature, we achieve a level of tenderness and juiciness that’s simply unrivaled.To enhance the flavor profile, we season our chicken with a blend of salt, pepper, garlic, and a hint of paprika, but feel free to customize the seasoning to your liking.
With a beautifully seared exterior and a tender, flavorful interior, these sous vide chicken thighs are sure to leave your guests impressed and your taste buds delighted. It’s a restaurant-quality meal prepared in the comfort of your own kitchen. Join us on this culinary journey, and let’s create a memorable dining experience together.
Read: Best Sous Vides Under $100
//z-na.amazon-adsystem.com/widgets/onejs?MarketPlace=US&adInstanceId=db2d8034-1d3a-4ce2-967c-0cdb28c42cd9Why should you sous vide chicken thighs?
Precise Sous Vide Cooking: Sous vide transforms chicken thighs with precision, immersing them in a water bath to create consistently tender, flavorful results.
Golden Crisp Perfection: Searing in a cast iron skillet adds a tantalizingly crispy skin, balancing the textures for a culinary masterpiece.
Elevate Home Dining: Master the art of sous vide and enjoy restaurant-quality chicken thighs in the comfort of your own kitchen, impressing guests and delighting taste buds.
[wptb id=428]What equipment to use
Disclaimer: we may earn a commission if you purchase directly through a link on the site.
Sous Vide Machine – This device is essential for maintaining a precise water temperature during the sous vide cooking process. Ensure it’s capable of reaching and holding 140°F (60°C).
Sous Vide Containers – Because of how large the brisket typically usually is, I’d recommend an actual container for the bath. The meat will need to fit comfortably inside so it can cook evenly.
Vacuum Sealer: To properly seal the sausages for sous vide cooking, you can use a vacuum sealer with appropriate bags.
Making the Chicken Thighs
Day of: Give yourself around three hours of cooking if you are intending on making these chicken thigs the day you’re planning on eating them.
Meal prepping: To save yourself time throughout the week, you are able to store these in the fridge for no longer than four days. After that, they start to go bad. But before you stick them immediately into the fridge, we recommend that you cool them down first in a bowl of ice water.
Freezer: You can definitely put these in the freezer for up to several months.
Sous Vide Chicken Thighs Ingredients
Chicken thighs – both bone-in and boneless chicken thighs work for this recipe.
Seasoning – Fresh herbs really help solidify the flavor of the chicken thighs while it is cooking. My favorites to work with are rosemary and thyme.
Salt – Kosher salt is the most preferred.
Pepper – Whenever it is possible, use freshly ground pepper as it tends to be the strongest tasting.
How to make sous vide chicken thighs
1) Fill your large container or sous vide bath with water. Attach your sous vide machine and set the temperature to between 145°F – 150°F (62.5°C – 65.6°C) depending on your desired level of doneness and crispiness.
Lower temperatures will result in juicier but less crispy chicken, while higher temperatures will be crispier but slightly drier.
2) Season your chicken thighs with a mixture of salt, pepper, garlic, and a little paprika, or use your preferred seasonings.
3) Place the seasoned chicken thighs into a ziplock bag or vacuum-sealed bag. Add a bit of olive oil to the bag along with the seasonings for added flavor.
4) Carefully lower the bag into the sous vide water bath, ensuring that the chicken is fully submerged. Cook the chicken for between 1 hour and 4 hours.
For most chicken thigh recipes, it’s recommended to cook them for between 75 – 85 minutes. Longer cook times can make the meat even more tender.
5) After the sous vide cooking is complete, remove the chicken thighs from the bag. They may not look very appealing at this point, so you’ll want to sear them to add color and flavor.
Heat a cast iron skillet over high heat, add some oil, and place the chicken thighs in the skillet, skin side down. Sear them for roughly four minutes on each side or until the skin becomes crispy and golden brown.
6) Once seared, remove the chicken from the skillet and let them rest for a few minutes before serving. This step ensures that the juices redistribute throughout the meat, resulting in a juicier final product.
Serve your sous vide chicken thighs with your favorite side dishes and enjoy!
Sous Vide Chicken Thighs

Make delicious, golden brown sous vide chicken thighs every time with this recipe.
- Sous vide machine
- sous vide container
- Vacuum sealer
- 6 Chicken thighs
- 1 pinch Salt
- 1 pinch Pepper
- 1 tsp Garlic
- 1 tsp Paprika
- 1/2 cup Olive Oil
Fill your large container or sous vide bath with water. Attach your sous vide machine and set the temperature to between 145°F – 150°F (62.5°C – 65.6°C) depending on your desired level of doneness and crispiness.
Lower temperatures will result in juicier but less crispy chicken, while higher temperatures will be crispier but slightly drier.
Season your chicken thighs with a mixture of salt, pepper, garlic, and a little paprika, or use your preferred seasonings.
Place the seasoned chicken thighs into a ziplock bag or vacuum-sealed bag. Add a bit of olive oil to the bag along with the seasonings for added flavor.
Carefully lower the bag into the sous vide water bath, ensuring that the chicken is fully submerged. Cook the chicken for between 1 hour and 4 hours.
For most chicken thigh recipes, it's recommended to cook them for between 75 – 85 minutes. Longer cook times can make the meat even more tender.
After the sous vide cooking is complete, remove the chicken thighs from the bag. They may not look very appealing at this point, so you'll want to sear them to add color and flavor.
Heat a cast iron skillet over high heat, add some oil, and place the chicken thighs in the skillet, skin side down. Sear them for roughly four minutes on each side or until the skin becomes crispy and golden brown.
Once seared, remove the chicken from the skillet and let them rest for a few minutes before serving. This step ensures that the juices redistribute throughout the meat, resulting in a juicier final product.
Serve your sous vide chicken thighs with your favorite side dishes and enjoy!
Frequently Asked Questions
How long do you sous vide chicken thigs?
The chicken thighs need to be sous vide for 1.5 hours depending on your bath temperature.
What temperature should you sous vide chicken thigs?
Set your sous vide machine between 145F – 150F for the level of crispness you desire.
What can you serve with chicken thighs?
You can serve tons of different sides with this recipe. We love eating this with a nice summer salad.
Should I use bone-in or boneless chicken thighs?
It is really up to you to decide between these two types of chicken thights. However, I prefer to work with boneless thighs for this recipe.
Sous Vide Recipes
{ “@context”: “http://schema.org”, “@type”: “Recipe”, “name”: “Sous Vide for All”, “author”: { “@type”: “Person”, “name”: “Sous Vide for All” }, “image”: “https://sousvideforall.com/wp-content/uploads/2024/02/afa99-huenerschenkel_chicken_thigh.jpg”, “description”: “A delicious sous vide chicken thigh recipe with crispy skin and tender meat.”, “recipeCategory”: “Main Course”, “cookTime”: “PT1H”, “prepTime”: “PT15M”, “totalTime”: “PT1H15M”, “recipeIngredient”: [ “Chicken thighs”, “Salt”, “Pepper”, “Garlic”, “Paprika”, “Olive oil” ], “recipeInstructions”: [ { “@type”: “HowToStep”, “text”: “Fill your large container or sous vide bath with water. Attach your sous vide machine. Set the temperature to between 145°F – 150°F depending on what level of crisp you want.” }, { “@type”: “HowToStep”, “text”: “Season your chicken thighs with whatever you prefer. However, for us, we like using salt, pepper, garlic, and a little bit of paprika.” }, { “@type”: “HowToStep”, “text”: “Get a zip lock bag or vacuum sealed bag and fill it olive oil and your seasonings.” }, { “@type”: “HowToStep”, “text”: “Cook the chicken in the sous vide container for between 1 hour and 4 hours. We recommend cooking the chicken for between 75 – 85 minutes.” }, { “@type”: “HowToStep”, “text”: “After you take the chicken thighs out if its bath, you can sear them in a cast iron skillet. Add oil and sear the thighs skin side down for roughly four minutes each.” } ], “recipeYield”: “2 servings” } -
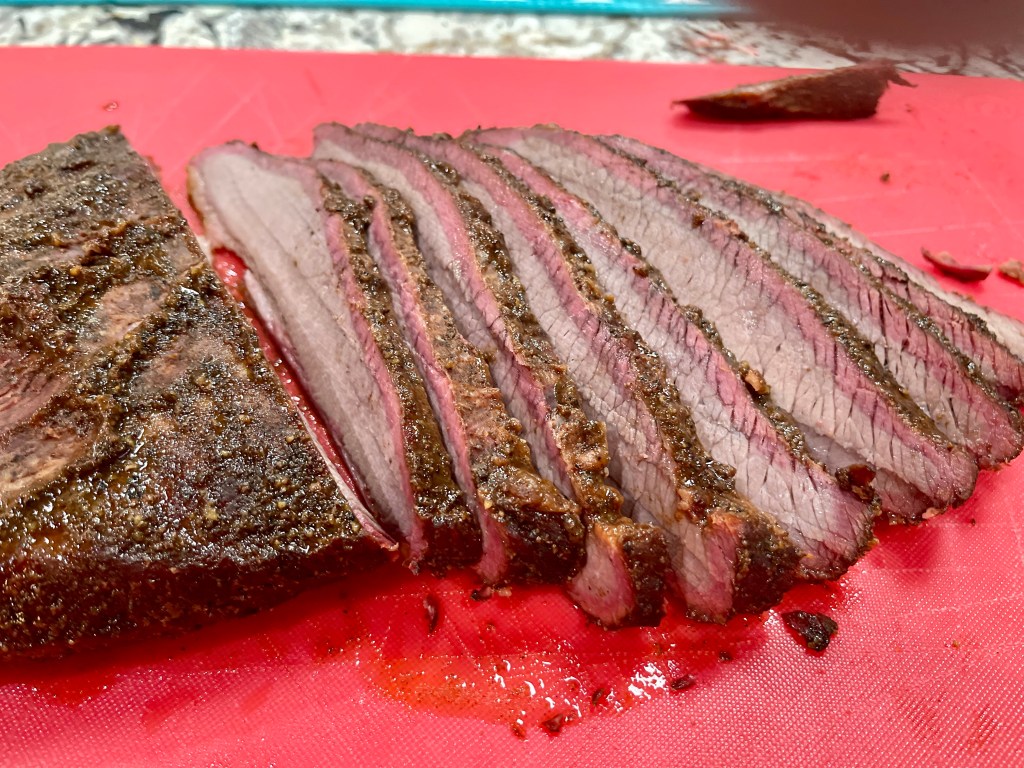
Sous Vide Brisket Recipe
Disclaimer: Some links on the site may take you to affiliate links where we earn a small percentage if you choose to purchase something. You are in no way obiligated to purchase something.
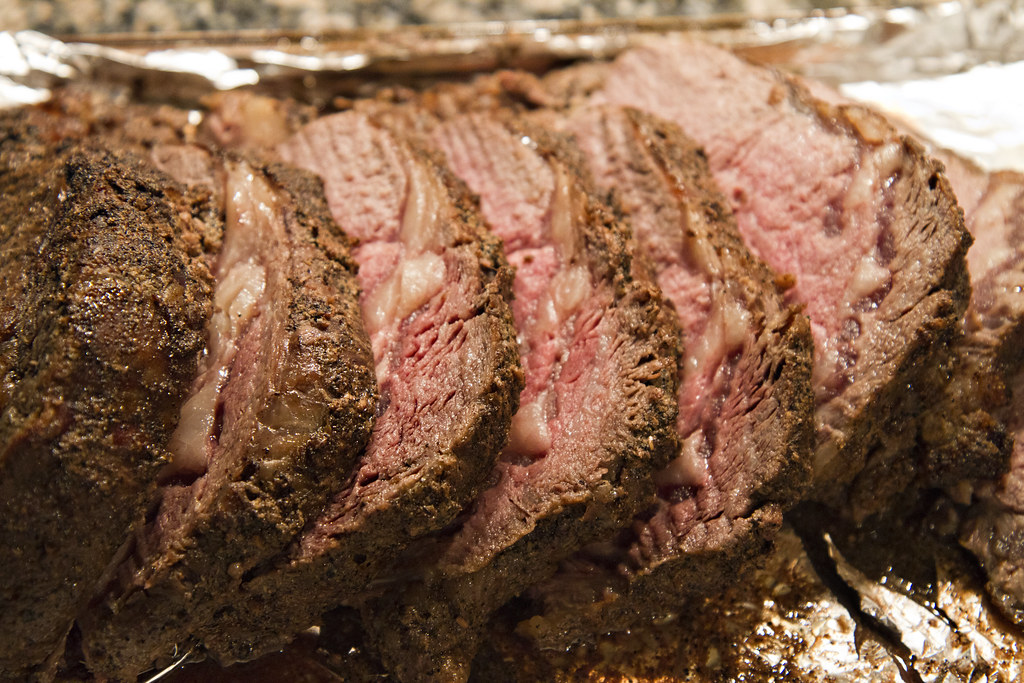
Brisket is one of the most difficult pieces of meat to barbecue. You have to constantly monitor it, make sure that the brisket is getting the proper amount of heat. But have you ever considered a sous vide brisket? As ridiculous as it might sound, this might be an awesome substitute if you don’t have a large smoker handy.
Ready to dive into this recipe? Let’s go!
Read: Best Sous Vides Under $100
Check out our recommended sous vide’s.
[wptb id=402]Why this Sous Vide brisket recipe works
If you are looking for flavor in your brisket, boy does this recipe have it! You can still get amazing results in a brisket even without having a smoker. That is because the sous vide is able to lock in all the aromas in there while it’s bathing in a sous vide container.
The main rule for cooking brisket is to keep it low and slow. You can do just that in a sous vide. However, it will take a little longer to accomplish with this sous vide recipe, but the results will be just as good. Most suggest to slow cook the brisket for around 48 hours. On a smoker, normally, that would be around 12-18 hours, depending on your preference.
Serve this brisket before a large gathering. Your whole party will surely enjoy the fruits of your labor!
What Equipment Should I Use?
Sous Vide Machine – Get your handy sous vide machine out! It’s time to put it to work. Don’t have one? Click on the link to make your first purchase.
Sous Vide Containers – Because of how large the brisket typically usually is, I’d recommend an actual container for the bath. The meat will need to fit comfortably inside so it can cook evenly.
What Ingredients Should I Use?
Salt and pepper – you can use salt and pepper to your taste. However, we recommend seasoning both sides of the brisket liberally.
4-6 lb of Brisket
How to Sous Vide Brisket
1) Start by trimming the brisket, removing any excess fat, and ensuring it’s clean and well-shaped.
2) Season both sides of the brisket generously with salt and pepper. The amount of seasoning can vary based on your preference, but a good rule of thumb is about 1-2 tablespoons of salt and 1-2 teaspoons of pepper for a 4-6 pound brisket.
3) Fill a large container or sous vide bath with water, ensuring that it’s deep enough to submerge the brisket completely.
4) Attach your sous vide machine and set the temperature to 135°F (57°C). This temperature is ideal for achieving a perfectly tender brisket with a medium-rare to medium level of doneness.
5) Place the seasoned brisket into a vacuum-sealable bag, ensuring it lies flat for even cooking.
6) Vacuum seal the bag, removing as much air as possible. The vacuum-sealed bag will help maintain the integrity of the brisket’s flavor and texture during the long cooking process.
7) Carefully lower the vacuum-sealed brisket into the preheated sous vide bath.
Cook the brisket at 135°F (57°C) for 48 hours. This extended cooking time will result in a tender and juicy brisket.8) After the sous vide cooking time is up, remove the brisket from the water bath.
Carefully open the vacuum-sealed bag and remove the brisket. Be mindful of the juices that may have collected in the bag; you can use them as a flavorful sauce if desired.
9) Pat the brisket dry with paper towels. This step is essential for achieving a good sear on the grill.
Preheat your grill to high heat (around 450-500°F or 232-260°C).
Place the brisket on the hot grill grates.Grill each side for approximately 5-10 minutes, or until a beautiful crust forms. Keep a close eye on it to avoid burning.
Remove the brisket from the grill, and let it rest for about 10 minutes before slicing.
Slice the sous vide brisket against the grain into thin slices for maximum tenderness.
Serve your delicious sous vide brisket with your favorite barbecue sauce, coleslaw, and other sides of your choice.
Sous Vide Brisket

- Sous vide machine
- sous vide container
- 1 brisket
- 1/4 cup salt
- 1/4 cup pepper
Start by trimming the brisket, removing any excess fat, and ensuring it's clean and well-shaped.
Season both sides of the brisket generously with salt and pepper. The amount of seasoning can vary based on your preference, but a good rule of thumb is about 1-2 tablespoons of salt and 1-2 teaspoons of pepper for a 4-6 pound brisket.
Fill a large container or sous vide bath with water, ensuring that it's deep enough to submerge the brisket completely.
Attach your sous vide machine and set the temperature to 135°F (57°C). This temperature is ideal for achieving a perfectly tender brisket with a medium-rare to medium level of doneness.
Place the seasoned brisket into a vacuum-sealable bag, ensuring it lies flat for even cooking.
Vacuum seal the bag, removing as much air as possible. The vacuum-sealed bag will help maintain the integrity of the brisket's flavor and texture during the long cooking process.
Carefully lower the vacuum-sealed brisket into the preheated sous vide bath.Cook the brisket at 135°F (57°C) for 48 hours. This extended cooking time will result in a tender and juicy brisket.
After the sous vide cooking time is up, remove the brisket from the water bath.
Carefully open the vacuum-sealed bag and remove the brisket. Be mindful of the juices that may have collected in the bag; you can use them as a flavorful sauce if desired.
Pat the brisket dry with paper towels. This step is essential for achieving a good sear on the grill.
Preheat your grill to high heat (around 450-500°F or 232-260°C).Place the brisket on the hot grill grates. Grill each side for approximately 5-10 minutes, or until a beautiful crust forms. Keep a close eye on it to avoid burning.
Remove the brisket from the grill, and let it rest for about 10 minutes before slicing. Slice the sous vide brisket against the grain into thin slices for maximum tenderness. Serve your delicious sous vide brisket with your favorite barbecue sauce, coleslaw, and other sides of your choice.
Frequently Asked Questions
How long does it take to sous vide brisket?
It can take around 48 hours for a brisket to cook at the 135F temperature.
What temperature do you cook brisket with a sous vide?
The ideal temperature to set your sous vide at is 135F.
Can you sous vide a whole brisket?
Yes, you can sous vide a whole brisket. Generally, look for a brisket that is between 4 and 6 pounds. That should fit nicely in your sous vide container.
More sous vide recipes to enjoy!
{ “@context”: “https://schema.org”, “@type”: “Recipe”, “name”: “Sous Vide Brisket”, “description”: “A step-by-step guide to creating a delicious sous vide brisket with a perfect balance of flavors and tenderness.”, “author”: { “@type”: “Person”, “name”: “Sous Vide for All” }, “image”: “https://sousvideforall.com/wp-content/uploads/2024/02/2ada7-sous-vide-brisket.jpg”, “prepTime”: “PT30M”, “cookTime”: “PT48H”, “totalTime”: “PT48H30M”, “recipeCategory”: “Main Course”, “recipeCuisine”: “American”, “keywords”: “sous vide, brisket, BBQ”, “recipeIngredient”: [ “1 4-6 pound brisket”, “Salt (to taste)”, “Pepper (to taste)” ], “recipeInstructions”: [ { “@type”: “HowToStep”, “text”: “Start by trimming the brisket, removing any excess fat, and ensuring it’s clean and well-shaped.” }, { “@type”: “HowToStep”, “text”: “Season both sides of the brisket generously with salt and pepper. The amount of seasoning can vary based on your preference, but a good rule of thumb is about 1-2 tablespoons of salt and 1-2 teaspoons of pepper for a 4-6 pound brisket.” }, { “@type”: “HowToStep”, “text”: “Fill a large container or sous vide bath with water, ensuring that it’s deep enough to submerge the brisket completely.” }, { “@type”: “HowToStep”, “text”: “Attach your sous vide machine and set the temperature to 135°F (57°C). This temperature is ideal for achieving a perfectly tender brisket with a medium-rare to medium level of doneness.” }, { “@type”: “HowToStep”, “text”: “Place the seasoned brisket into a vacuum-sealable bag, ensuring it lies flat for even cooking.” }, { “@type”: “HowToStep”, “text”: “Vacuum seal the bag, removing as much air as possible. The vacuum-sealed bag will help maintain the integrity of the brisket’s flavor and texture during the long cooking process.” }, { “@type”: “HowToStep”, “text”: “Carefully lower the vacuum-sealed brisket into the preheated sous vide bath.” }, { “@type”: “HowToStep”, “text”: “Cook the brisket at 135°F (57°C) for 48 hours. This extended cooking time will result in a tender and juicy brisket.” }, { “@type”: “HowToStep”, “text”: “After the sous vide cooking time is up, remove the brisket from the water bath.” }, { “@type”: “HowToStep”, “text”: “Carefully open the vacuum-sealed bag and remove the brisket. Be mindful of the juices that may have collected in the bag; you can use them as a flavorful sauce if desired.” }, { “@type”: “HowToStep”, “text”: “Pat the brisket dry with paper towels. This step is essential for achieving a good sear on the grill.” }, { “@type”: “HowToStep”, “text”: “Preheat your grill to high heat (around 450-500°F or 232-260°C).” }, { “@type”: “HowToStep”, “text”: “Place the brisket on the hot grill grates.” }, { “@type”: “HowToStep”, “text”: “Grill each side for approximately 5-10 minutes, or until a beautiful crust forms. Keep a close eye on it to avoid burning.” }, { “@type”: “HowToStep”, “text”: “Remove the brisket from the grill, and let it rest for about 10 minutes before slicing.” }, { “@type”: “HowToStep”, “text”: “Slice the sous vide brisket against the grain into thin slices for maximum tenderness.” }, { “@type”: “HowToStep”, “text”: “Serve your delicious sous vide brisket with your favorite barbecue sauce, coleslaw, and other sides of your choice.” } ] } -
Pork Chop Sous Vide
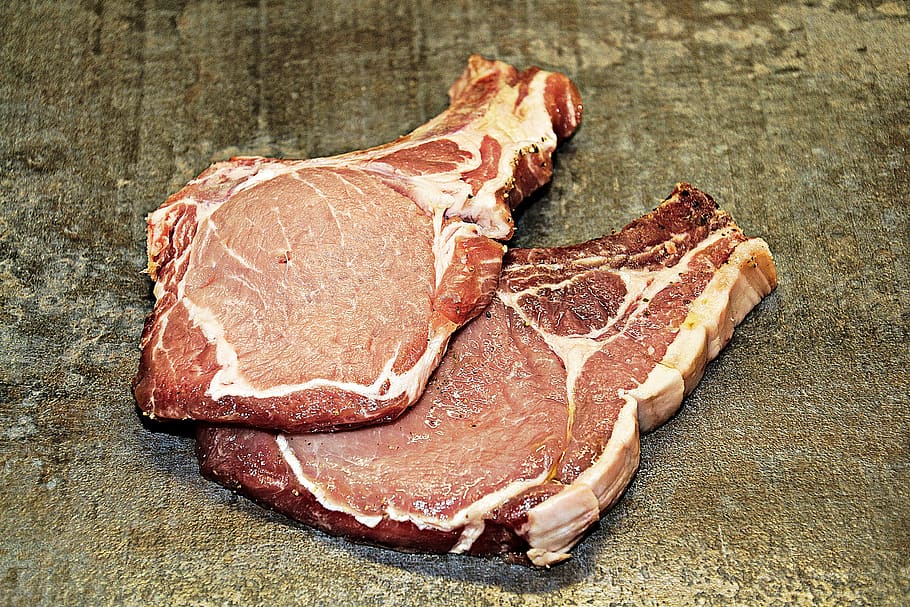
By cooking the pork chops at a low and consistent temperature, the meat will be tender and juicy, with all of the flavors and juices sealed in. Once the pork chops are cooked, we’ll give them a quick sear in a hot skillet to create a flavorful crust on the outside. This recipe is perfect for anyone looking for a foolproof way to cook delicious sous vide pork chops that are guaranteed to impress.
//z-na.amazon-adsystem.com/widgets/onejs?MarketPlace=US&adInstanceId=db2d8034-1d3a-4ce2-967c-0cdb28c42cd9Why This Recipe Works
The meat is cooked at a precise temperature for a specific amount of time, resulting in evenly cooked pork chops with a perfect texture every time.
Sous vide cooking also helps to retain the moisture in the pork chops, resulting in a tender and juicy final product. This is because the meat is cooked in a sealed bag, which prevents the moisture from escaping and drying out the meat.
Sous vide cooking is a relatively hands-off cooking method that requires minimal effort on your part. Once you’ve seasoned the pork chops and placed them in the sous vide bag, you simply need to set the temperature and cooking time on the machine and let it do the rest. This makes it a great option for busy weeknights or when you’re entertaining guests and want to spend more time socializing than cooking.
[wptb id=428]Ingredients for a Sous Vide Pork Chop:
- 4 bone-in pork chops, about 1 inch thick
- 1 tablespoon olive oil
- 1 tablespoon minced fresh rosemary
- 1 tablespoon minced fresh thyme
- 1 tablespoon minced fresh sage
- 2 cloves garlic, minced
- Salt and pepper, to taste
How to Cook the Sous Vide Pork Chops:
- Preheat your sous vide machine to 140°F (60°C).
- Season the pork chops with a good amount of salt and pepper.
- In a small bowl, mix together the olive oil, rosemary, thyme, sage, and garlic. Rub the mixture all over the pork chops.
- Place the pork chops in a large ziplock bag, making sure they are in a single layer and not overlapping. Seal the bag using the water displacement method (submerge the bag in water up to the zipper, letting the water push the air out before sealing it).
- Once the sous vide machine is at temperature, place the bag of pork chops in the water bath and cook for 1 to 2 hours, depending on the thickness of the chops. The longer you cook them, the more tender they will become, but be careful not to overcook them.
- When the cooking time is up, remove the bag of pork chops from the water bath and transfer the chops to a plate. Pat them dry with paper towels.
- Heat a large skillet over high heat. Add a tablespoon of oil and let it heat up for a minute.
- Add the pork chops to the skillet and sear for 1 to 2 minutes on each side, until browned and crispy.
- Serve the pork chops hot with your favorite sides.
Frequently Asked Questions
How long do I need to cook the pork chops in the sous vide machine?
The cooking time will depend on the thickness of the pork chops, but generally, it will take 1 to 2 hours at 140°F (60°C).
Can I use boneless pork chops instead of bone-in?
Yes, you can use boneless pork chops instead of bone-in, but the cooking time may be slightly different.
Do I need to use a vacuum sealer, or can I use a regular ziplock bag?
You can use a regular ziplock bag and the water displacement method to remove the air from the bag.
Is it necessary to sear the pork chops after cooking them in the sous vide machine?
Searing the pork chops after cooking them in the sous vide machine will create a flavorful crust on the outside, but it is not necessary.
Can I prep the pork chops ahead of time and then cook them in the sous vide machine later?
Yes, you can prep the pork chops ahead of time and then cook them in the sous vide machine later. Just make sure to store them in the refrigerator until you’re ready to cook.
{ “@context”: “https://schema.org”, “@type”: “FAQPage”, “mainEntity”: [ { “@type”: “Question”, “name”: “How long do I need to cook the pork chops in the sous vide machine?”, “acceptedAnswer”: { “@type”: “Answer”, “text”: “The cooking time will depend on the thickness of the pork chops, but generally, it will take 1 to 2 hours at 140°F (60°C).” } }, { “@type”: “Question”, “name”: “Can I use boneless pork chops instead of bone-in?”, “acceptedAnswer”: { “@type”: “Answer”, “text”: “Yes, you can use boneless pork chops instead of bone-in, but the cooking time may be slightly different.” } }, { “@type”: “Question”, “name”: “Do I need to use a vacuum sealer, or can I use a regular ziplock bag?”, “acceptedAnswer”: { “@type”: “Answer”, “text”: “You can use a regular ziplock bag and the water displacement method to remove the air from the bag.” } }, { “@type”: “Question”, “name”: “Is it necessary to sear the pork chops after cooking them in the sous vide machine?”, “acceptedAnswer”: { “@type”: “Answer”, “text”: “Searing the pork chops after cooking them in the sous vide machine will create a flavorful crust on the outside, but it is not necessary.” } }, { “@type”: “Question”, “name”: “Can I prep the pork chops ahead of time and then cook them in the sous vide machine later?”, “acceptedAnswer”: { “@type”: “Answer”, “text”: “Yes, you can prep the pork chops ahead of time and then cook them in the sous vide machine later. Just make sure to store them in the refrigerator until you’re ready to cook.” } } ] } { “@context”: “https://schema.org/”, “@type”: “Recipe”, “name”: “Sous Vide Pork Chops”, “image”: “https://sousvideforall.com/wp-content/uploads/2024/02/b0e43-sous-vide-pork-chops.jpg”, “datePublished”: “2023-03-20”, “description”: “Tender and juicy pork chops cooked to perfection using a sous vide machine.”, “prepTime”: “PT10M”, “cookTime”: “PT2H”, “totalTime”: “PT2H10M”, “recipeYield”: “4 servings”, “recipeIngredient”: [ “4 bone-in pork chops, 1 inch thick”, “1 tbsp olive oil”, “1 tbsp chopped fresh thyme”, “1 tbsp chopped fresh rosemary”, “1 tbsp chopped fresh sage”, “2 garlic cloves, minced”, “Salt and pepper, to taste” ], “recipeInstructions”: [ { “@type”: “HowToStep”, “text”: “Preheat the sous vide machine to 140°F (60°C).” }, { “@type”: “HowToStep”, “text”: “Season the pork chops with salt and pepper.” }, { “@type”: “HowToStep”, “text”: “In a bowl, mix together the olive oil, thyme, rosemary, sage, and garlic.” }, { “@type”: “HowToStep”, “text”: “Rub the herb mixture onto the pork chops, making sure to coat them evenly.” }, { “@type”: “HowToStep”, “text”: “Place the pork chops into a sous vide bag and seal using a vacuum sealer or the water displacement method.” }, { “@type”: “HowToStep”, “text”: “Cook the pork chops in the sous vide machine for 1 to 2 hours, depending on the thickness of the pork chops.” }, { “@type”: “HowToStep”, “text”: “Remove the pork chops from the sous vide bag and pat dry with a paper towel.” }, { “@type”: “HowToStep”, “text”: “Heat a skillet over high heat and add a tablespoon of oil.” }, { “@type”: “HowToStep”, “text”: “Sear the pork chops for 1 to 2 minutes on each side, until golden brown.” }, { “@type”: “HowToStep”, “text”: “Serve hot and enjoy!” } ] } }More Sous Vide Recipes
-
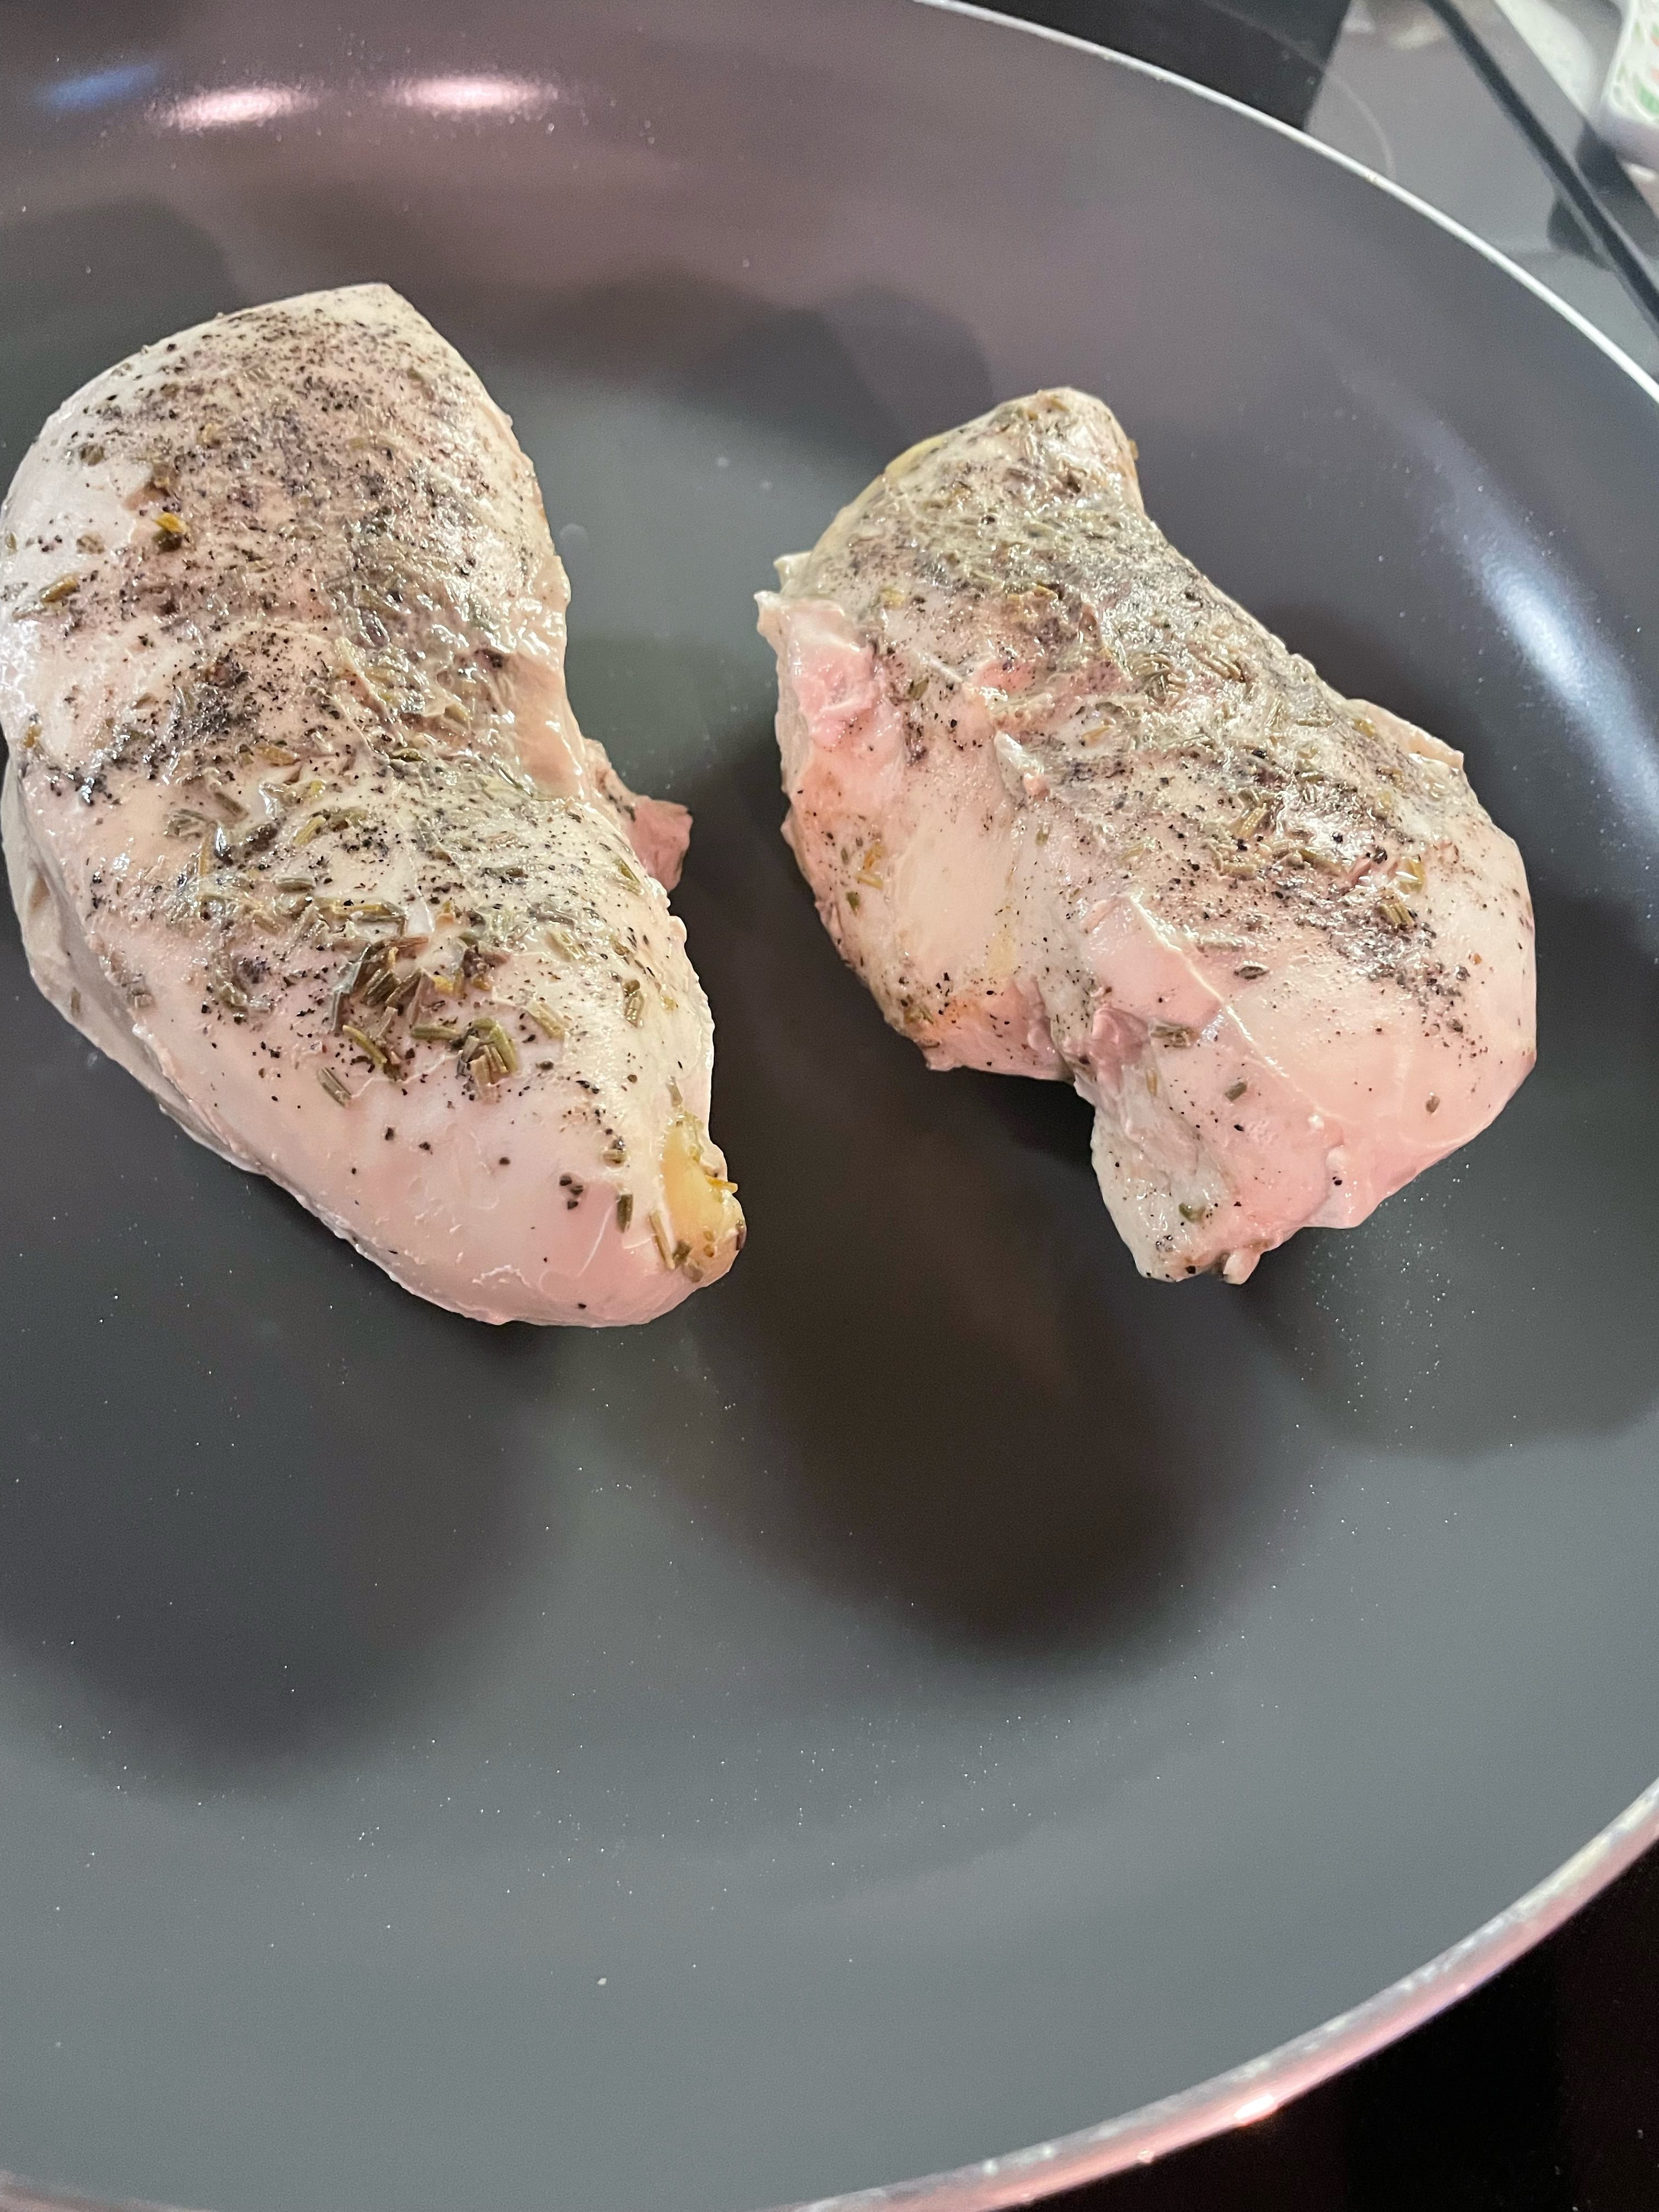
Sous Vide Chicken Breasts Recipe
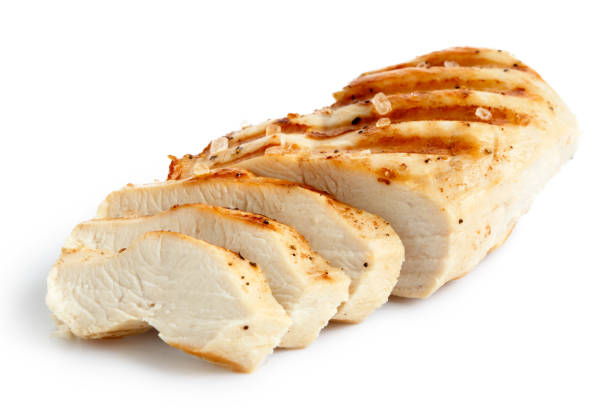
Want to make awesome chicken breasts? Sous vide chicken breasts are a great way to elevate the tenderness and flavor of your chicken over and over again. What makes this recipe awesome is that you can easily switch out whatever seasonings you prefer using for chicken.
[wptb id=428]Ready to make perfect chicken breasts? Continue reading and take your skills to the next level!
Temperature and Cooking Time
If you want your chicken to be soft and tender, set your sous vide machine between 140F – 149F and cook for around one and a half hours. Want your chicken to be a little bit more stringy? Then make sure your bath is warmed to 150F – 159F.
Ingredients
2 chicken breasts – we recommend boneless chicken breasts
Fresh cracked pepper to taste – basic spices are the way to go
Rosemary sprigs for added flavor – rosemary elevates the chicken
2 teaspoons of olive oil for searing
How to Sous Vide Chicken Breasts
In order to sous vide your chicken breasts, you can place them into a gallon size zip lock bag and use the water displacement method or vacuum seal it if you prefer.

Next, fill whatever large pot or sous vide bath container and get it warmed to somewhere between 145F – 150F. We have found that this is a great range to get the chicken tender enough while still staying perfectly juicy.
After the chicken breasts have been cooked, warm up a skillet on your oven and toss in two table spoons of your choice of cooking oil. Place the chicken in your pan and sear it for just a 5 – 10 minutes.
Serve immediately with your choice of sides!
Sous Vide Equipment
Sous Vide Machines – a good reliable sous vide machine will help
Vacuum Sealers – if you don’t want to use ziplocks, while they can be expensive, a vacuum sealed bag will ensure that your food is cooked evenly each time
Frequently Asked Questions
How long should you sous vide boneless chicken breasts?
At a minimum, the chicken breasts should cook for at least an hour to get them to the safe consumption temperature.
Can you make these chicken breasts ahead of time?
Yes! Because of how quickly (compared to other meats) you can cook these chicken breasts, you can replicate this process over and over again.
What temperature can you cook chicken breasts at using sous vide?
The ideal sous vide bath temperature is between 145F – 150F.
Sous Vide Chicken Breasts

Sous vide chicken breasts are a great way to elevate the tenderness and flavor of your chicken over and over again.
- 2 Chicken Breasts
- Fresh cracked pepper
- 1 Sprig of rosemary
- 2 tsps olive oil (extra virgin)
Sous vide your chicken breasts, you can place them into a gallon size zip lock bag and use the water displacement method or vacuum seal it if you prefer.
Next, fill whatever large pot or sous vide bath container and get it warmed to somewhere between 145F – 150F.
After the chicken breasts have been cooked, warm up a skillet on your oven and toss in two table spoons of your choice of cooking oil. Place the chicken in your pan and sear it for just a 5 – 10 minutes.
Other Sous Vide Recipes
{ “@context”: “https://schema.org”, “@type”: “FAQPage”, “mainEntity”: [ { “@type”: “Question”, “name”: “How long should you sous vide boneless chicken breasts?”, “acceptedAnswer”: { “@type”: “Answer”, “text”: “At a minimum, the chicken breasts should cook for at least an hour to get them to the safe consumption temperature.” } }, { “@type”: “Question”, “name”: “Can you make these chicken breasts ahead of time?”, “acceptedAnswer”: { “@type”: “Answer”, “text”: “Yes! Because of how quickly (compared to other meats) you can cook these chicken breasts, you can replicate this process over and over again.” } }, { “@type”: “Question”, “name”: “What temperature can you cook chicken breasts at using sous vide?”, “acceptedAnswer”: { “@type”: “Answer”, “text”: “The ideal sous vide bath temperature is between 145F – 150F.” } } ] } -
Sous Vide Scallops Recipe
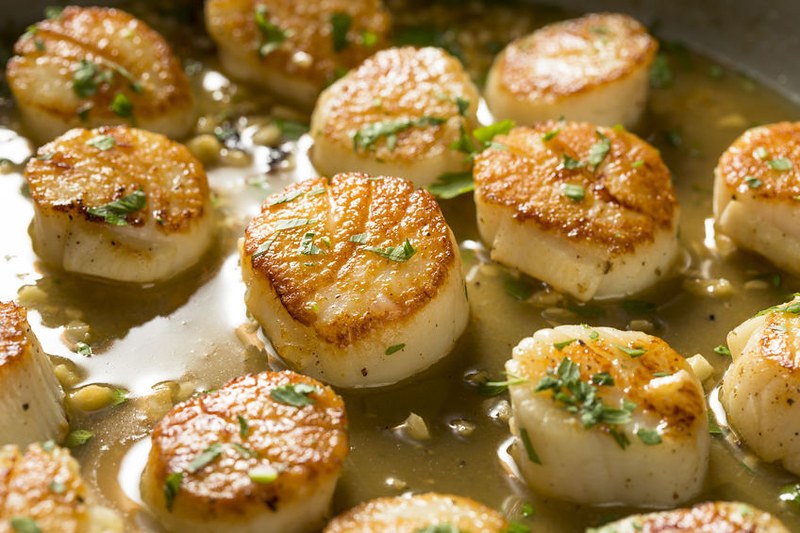
Scallops are one of the most delicious and tender sea foods to enjoy. However, cooking them on the stove top can be a bit challenging. If you leave them cooking for too long and they can easily burn. That is why we prefer sous vide scallops.
Prep time: 5 Minutes | Cook Time: 35 minutes | Total Time: 40 minutes
[wptb id=428]Why you should use the sous vide method
Sous vide cooking ensures that scallops are cooked evenly and consistently throughout, without drying out or becoming tough.
Ingredients for Scallops Sous Vide
One package of fresh scallops
Olive oil
Spices: we prefer salt, pepper, rosemary, and a little pinch of garlic
Unsalted butter
//z-na.amazon-adsystem.com/widgets/onejs?MarketPlace=US&adInstanceId=db2d8034-1d3a-4ce2-967c-0cdb28c42cd9How to Cook Sous Vide Scallops
1. Preheat your bath water in to 125 degrees F (or 51.6 degrees C).
2. Season your scallops with salt, pepper, and a pinch of garlic powder. Add your rosemary sprig to a resealable plastic bag.
3. Remove the air slowly from your bag so you can cook the scallops in the bath water using the water replacement method.
4. Let the scallops cook between 25 and 30 minutes for optimal tenderness.
5. Finish the scallops with a quick sear in a cast iron skillet to give it that charred bite.
Frequently Asked Questions
What temperature should I cook the scallops at?
The recommended temperature for cooking scallops sous vide is 125°F to 130°F (52°C to 54°C) for 45 minutes to 1 hour.
Do I need to sear the scallops after cooking them?
Yes, searing the scallops after cooking them sous vide is recommended as it helps to create a nice brown crust on the outside and adds additional flavor.
Can I sous vide frozen scallops?
Yes, you can sous vide frozen scallops, but it’s recommended to defrost them first to ensure even cooking.
How long can I keep the scallops in the fridge?
If stored properly in a vacuum-sealed bag, sous vide scallops can be kept in the fridge for up to 4 days.
Can I marinate scallops before cooking them sous vide?
Yes, you can marinate scallops before cooking them sous vide, but it’s recommended to use a marinade that is not too acidic as it can break down the delicate texture of the scallops.
Should I add oil or butter to the bag when cooking scallops sous vide?
It’s not necessary to add oil or butter to the bag when cooking scallops sous vide as they contain enough natural moisture. However, you can add a small amount of butter or oil to the bag for added flavor if desired.
Can I reuse the sous vide bag for cooking scallops?
It’s not recommended to reuse sous vide bags as they can harbor bacteria and compromise food safety. It’s best to use a new bag for each cooking session.
{ “@context”: “https://schema.org”, “@type”: “FAQPage”, “mainEntity”: [ { “@type”: “Question”, “name”: “What temperature should I cook scallops sous vide?”, “acceptedAnswer”: { “@type”: “Answer”, “text”: “The recommended temperature for cooking scallops sous vide is 125°F to 130°F (52°C to 54°C) for 45 minutes to 1 hour.” } }, { “@type”: “Question”, “name”: “Do I need to sear the scallops after cooking them sous vide?”, “acceptedAnswer”: { “@type”: “Answer”, “text”: “Yes, searing the scallops after cooking them sous vide is recommended as it helps to create a nice brown crust on the outside and adds additional flavor.” } }, { “@type”: “Question”, “name”: “Can I sous vide frozen scallops?”, “acceptedAnswer”: { “@type”: “Answer”, “text”: “Yes, you can sous vide frozen scallops, but it’s recommended to defrost them first to ensure even cooking.” } }, { “@type”: “Question”, “name”: “How long can I keep sous vide scallops in the fridge?”, “acceptedAnswer”: { “@type”: “Answer”, “text”: “If stored properly in a vacuum-sealed bag, sous vide scallops can be kept in the fridge for up to 4 days.” } }, { “@type”: “Question”, “name”: “Can I marinate scallops before cooking them sous vide?”, “acceptedAnswer”: { “@type”: “Answer”, “text”: “Yes, you can marinate scallops before cooking them sous vide, but it’s recommended to use a marinade that is not too acidic as it can break down the delicate texture of the scallops.” } }, { “@type”: “Question”, “name”: “Should I add oil or butter to the bag when cooking scallops sous vide?”, “acceptedAnswer”: { “@type”: “Answer”, “text”: “It’s not necessary to add oil or butter to the bag when cooking scallops sous vide as they contain enough natural moisture. However, you can add a small amount of butter or oil to the bag for added flavor if desired.” } }, { “@type”: “Question”, “name”: “Can I reuse the sous vide bag for cooking scallops?”, “acceptedAnswer”: { “@type”: “Answer”, “text”: “It’s not recommended to reuse sous vide bags as they can harbor bacteria and compromise food safety. It’s best to use a new bag for each cooking session.” } } ] }More Sous Vide Recipes
-
Best Sous Vide Under $100

If you are looking to dip your toes into the water of the sous vide world, you have come to the right place. Sous vides can get quite expensive real quick. However, at Sous Vide for All, we have the best sous vide under $100 to get you started on your journey.
Disclaimer: Please be aware that we may make a small commission if you make a purchase after clicking on any links on this post.
//z-na.amazon-adsystem.com/widgets/onejs?MarketPlace=US&adInstanceId=db2d8034-1d3a-4ce2-967c-0cdb28c42cd9What is sous vide?
Sous vide is a cooking technique that uses thermal immersion machines for precise cooking temperatures to deliver the best results. Generally, with the sous vide technique, you vacuum seal whatever you are attempting to cook. Then you place bag into a bath that has been heated to the perfect temperature. Let’s check out our best sous vides for under $100.
Sous Vide Recipes
- Sous Vide Prime Rib
- Sous Vide Prime Rib
- Sous Vide Sausage
- Sous Vide Tri Tip Recipe
- Sous Vide Chicken Thighs
Best sous vides under $100
[wptb id=428]1. Anova Culinary AN400-US00 Nano
[wptb id=424]Anova is one of the best well known brands in the sous vide world. They are always innovating and making their precision cookers even better. So, it is no wonder that the Anova Culinary AN400 is the best in class. The Anova Nano sous vide is great for those looking for an easy way to store their machine as some of the other devices can be a bit cumbersome.
One of the best parts about the Anova brand is their app. It’s loaded with helpful tips and videos on how to get whatever recipe (hopefully one of ours) just right. However, there have been notes made that the Bluetooth range on the app is limiting and that the controls can be hard to managed as well.
Price at time of publish: $99
2. Inkbird WIFI Sous Vide Machine ISV-100W
[wptb id=435]Up next on our list is the Inkbird sous vide machine. This precision cooker also comes with an intuitive app that can be connected via your home WiFi (however, the WiFi must support 2.4). Another great note about this machine is the fact that it is of the quieter sous vide devices out on the market. A lot of them can make a fair deal of noise while running, but not the Inkbird.
Several have noted in the reviews that there can be a slight issue with the touch panel not being that secure on the sous vide. The app is also not dedicated just to sous vide recipes.
Price at time of publish: $87.99
3. Instant Pot 800W Accu Slim Sous Vide Precision Cooker
[wptb id=437]There are no thrills or spills with the Instant Pot Accu Slim Sous Vide cooker. All you have to do with this devices to clamp the machine to your pot, set the time and temperature, and let it do its thing. Unlike the two options above, the Accu Slim does not come with a dedicated app, nor can it connect to your home WiFi. However, please seem to love that. It simply gets the job done.
Price at time of publish: $79.99
4. OOIIOR Sous Vide Machine
[wptb id=440]With a WiFi connected app, you are able to control the the OOIIOR Sous Vide’s temperature and time according to your recipe. This precision cooker heats up fairly quickly and can hold the temperature well during longer cooks.
The temperature range on this device, however, is a little lower than some of the others out there as it gets between 77-194°F (20℃-90°C). Another ding on the OOIIOR is the fact that you can only set the temperature in whole denominators. For those trying to get as precise as they can with their cooking, this may cause an issue.
Price at time of publish: $79.99
5. MegaChef MC-1000
[wptb id=433]If you do not care about your sous vide device having a connected app or any Bluetooth capabilities, then you may want to try out the MegaChef MC-1000. No matter how long you plan to cook using the sous vide method, the MC-1000 holds its temperature throughout the whole process. Further, if you are on a tighter budget, than this may be a great starter sous vide for you.
A few months into use, however, users may start to notice a whine on their device. Luckily, customer service is very supportive and will be able to help you with any problems that may arise.
Price at time of publish: $57.56
6. KitchenBoss 1100 Watt IPX7 Sous Vide
[wptb id=442]The KitchenBoss IPX7 sous vide is stainless steel and easy to take apart to clean. It cooks quietly with perfect temperature throughout.
Some users have noted that there could be an issue with temperature control. This product does potentially come with a warranty so make sure you consult it and talk to customer support before attempting a return.
Price at time of publish: $89.99
7. Yedi Infinity Sous Vide
[wptb id=443]You get a little bit more bang for your buck with the Yedi Infinity Sous Vide. Included with this is 1 hand pump, 20 reusable vacuum sealed bags, 4 sous vide container clips, 2 vacuum bag sealing clips, and more. The Yedi also remembers the last settings you used so you can easily get going on a recipe you enjoy,
Users have noted that it can be a bit confusing on how to actually turn the device on and get it going. But once operational, the sous vide held its temperature well.
Price at time of publish: $98.89
8. Mecity Sous Vide Precision Cooker
[wptb id=444]The basic functions of the Mecity Sous Vide work quite well. But the temperature range can be off by up to five degrees. The sous vide machine, though, is quite strong and heats the bath water up quickly.
Price at time of publish: $69.99
-
Subscribe
Subscribed
Already have a WordPress.com account? Log in now.
